In part 2 of behind the scenes I’ll be covering the Hunters model.
First off, why a model?
The nature of the idea of the small cute furry animal being hunted, wouldn’t have had the same impact if it was done as an illustration. I believe if you see an illustration you are removed instantly from the emotive aspect. I’m not saying that illustration doesn’t do that too, it’s just that it’s one step closer to being real so the emotion is stronger.
We know the little characters with spears are not real, but is the animal real? It’s these triggers in your head that confuse and challenge your emotions to a particular piece.
I really enjoyed creating this one. And for the animal fans out there, it’s all fake.
Another thing to know is that Tiny Owl Workshop only wanted to see the FINAL image. They didn’t know what I was creating, they wanted a surprise.
So where did I start?
I created some sketches to understand the characters and how they would look.
Once these were done, I began building the wire armature and filled out the areas which needed filling with wadding. Then it was covered in masking tape.
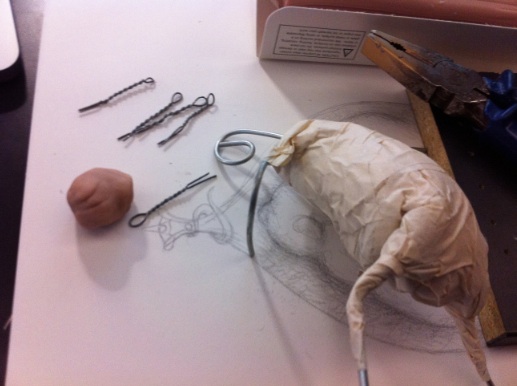
The small pieces of metal wire you see top left were for the hands. I usually build the clay over wire so I can bend and position the pieces for the final photograph. It also gives you something to hold when working on the pieces.
Once these were done, they gave me a sense of scale to create the heads and hands.
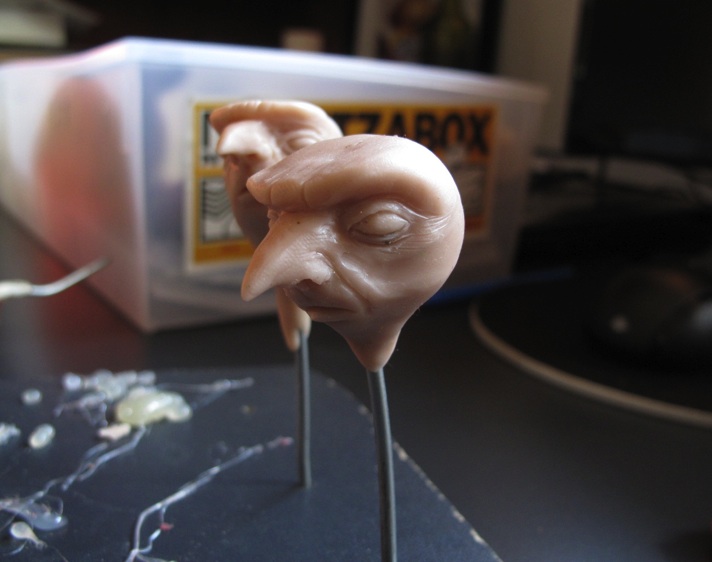

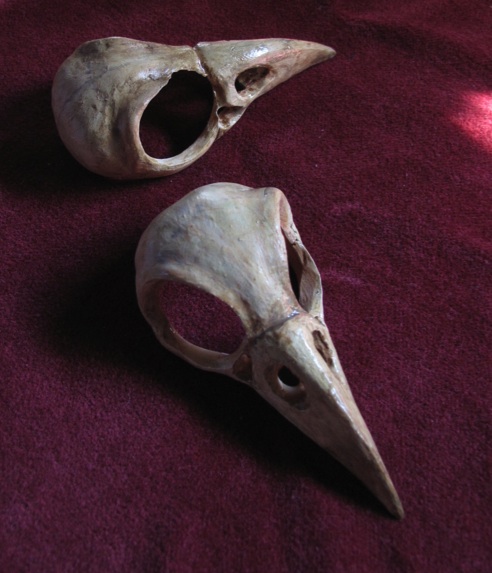
Once the heads and hands were baked and hard, I built the skulls around the heads. These were then also baked. You can see the bodies are covered in this shot which I talk about further in the post.
The skulls in the oven.

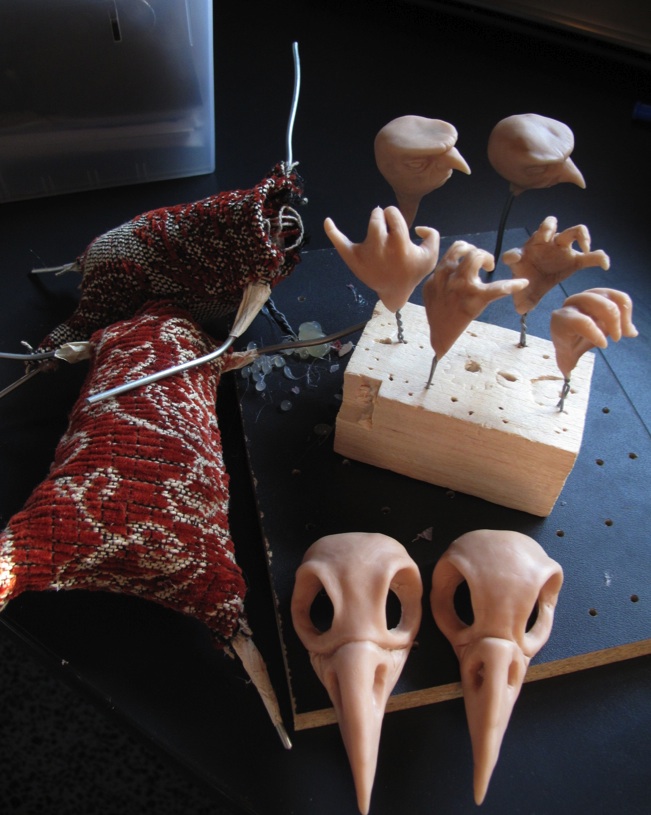
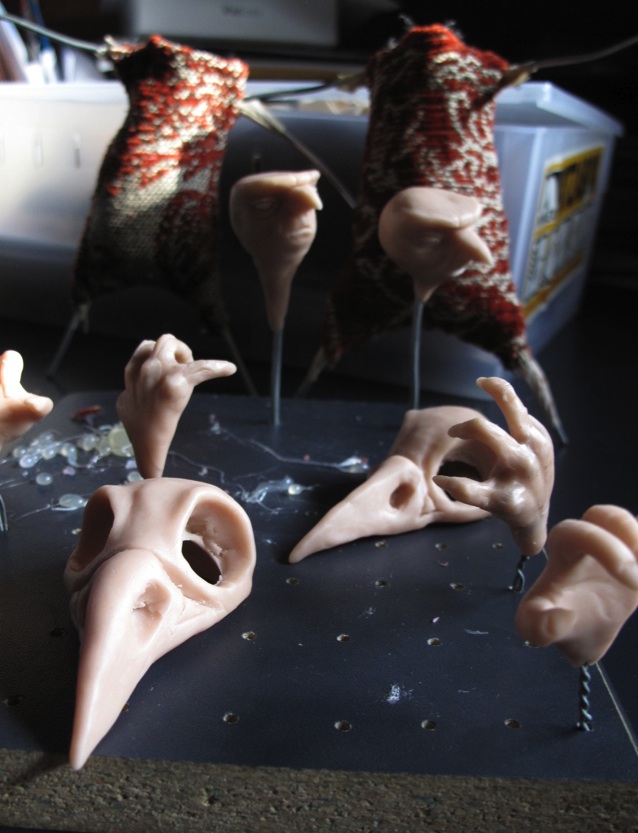
I used a Drimmel machine to add detail and open the area for where the head fits in. They were then painted and had a coating of satin gloss varnish over the top. I wanted these separate from the head to give myself flexibility when photographing. I could move and tilt the skulls to get the right angle when in front of the camera. Or remove them altogether.
The clothing was next. I have a bag full of odds & ends that I use from time to time. In my previous life in advertising I’ve made shrunken heads, Ferrets, Werewolves and Chihuahua slippers. After a while you tend to build up a few things.
The bodies were covered first and were fixed with hot glue. they were later stitched to create a finer seam. The arms and legs were next.

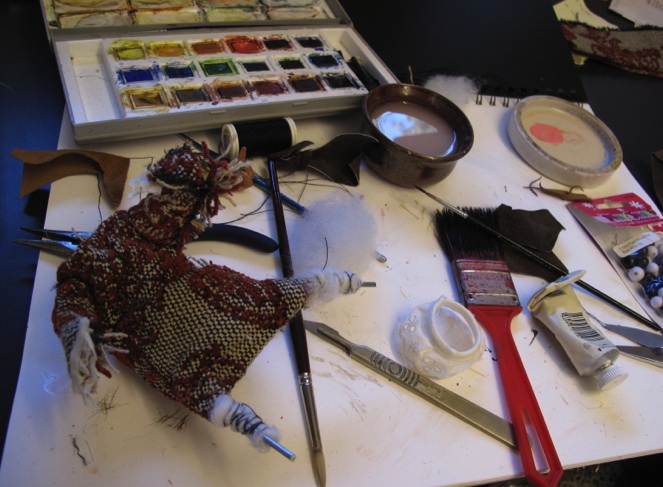
Then I added the frills on the ends. I liked this touch as the scene is so brutal the frills kinda lighten the image slightly. The little creatures care for their clothing and themselves more than the furry creature they’ve just hunted.
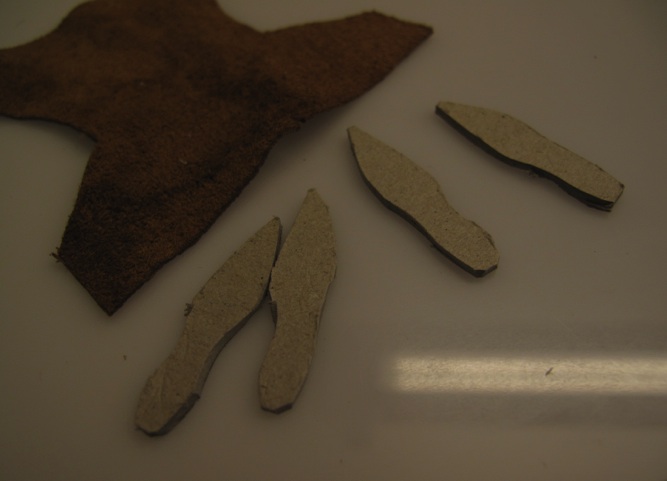
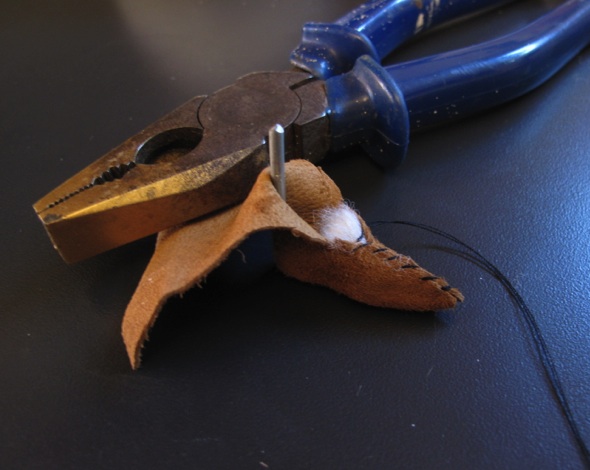
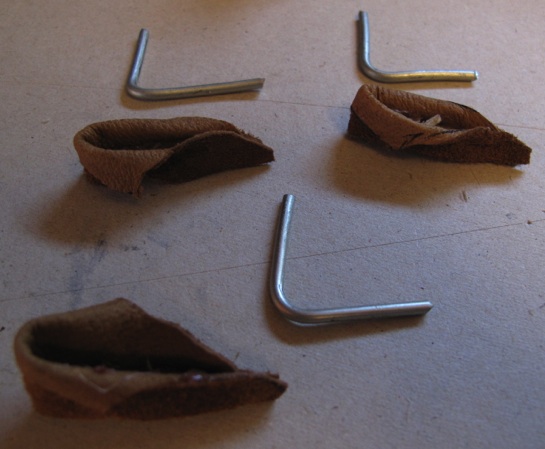
I made little leather shoes too. Being so small they were fiddly.
Here you can see the cardboard soles.
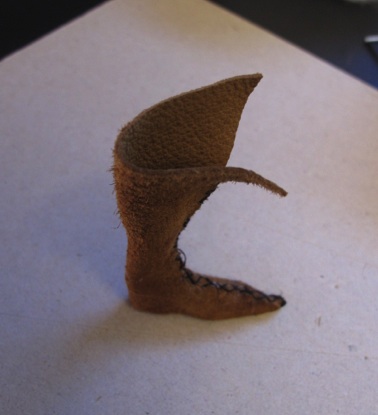
I added metal bars to strengthen the ankles.
I decided they were too high so I then trimmed them down. Then restitched the shoes.
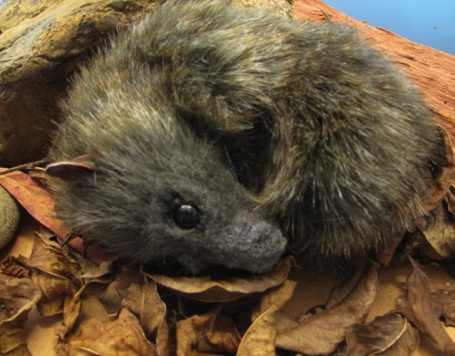
Next is the furry animal.
I did some research into taxidermy and used the same tricks to achieve my little guy.
I first built the body with a single piece of wire, so I could bend into shape, wadding and masking tape. Much the same as previous. The reason the body looks so thin is that I needed to allow for the thickness of the fur. I didn’t want a massive puff ball in the shot, that would look crazy!
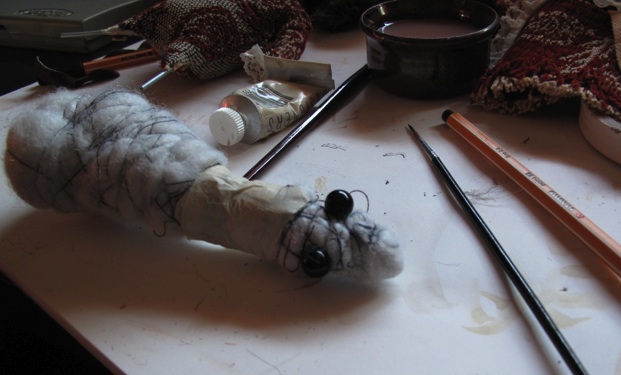
I used some small black beads and sewed them into the body.
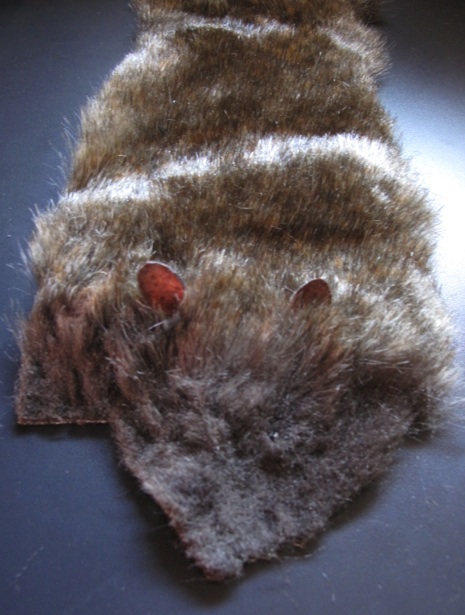
Now it’s time for the fur. I used fake fur that varied in tone. I trimmed out a rough shape to wrap around the body making sure the fur is falling in the right direction and shaved the area that would become the snout. Then I cut 2 slots for the eyes. The beads were simply pushed through the slots to be revealed on the other side. The fur in these areas were also trimmed back to simulate how real fur would be.
2 more slots were cut for the ears. The ears themselves were small pieces of leather, coloured and poked through to appear on the other side. Once everything was in place I stitched the fur body together down the belly.
The tail is simply grey silicone.
Then I bent the animal into shape and started placing the models into the environment. I grabbed some rocks and sticks from the garden and slowly built it up.
I positioned the characters and started to place in the background. I bought some artificial moss from the train shop (it was my first time in a model train shop) which was used at the base. The below image shows the overall staging. I simply used desk lamps to light the scene.

The spears are very cool twisted chopsticks which were sharpened.